
When done right, Excel functions are like magic. 🪄
They can be used for all sorts of things, from simple totaling of items on an order, to composing and appending strings of text to write a customized sentence, to using advanced logic to determine the correct decision based on available data. They're so useful in fact, we've now added them to workflows! You can use them to update fields and in Criteria Logic to select specific branches in Decision Tree steptypes. Follow this guide to get your functions up and running.
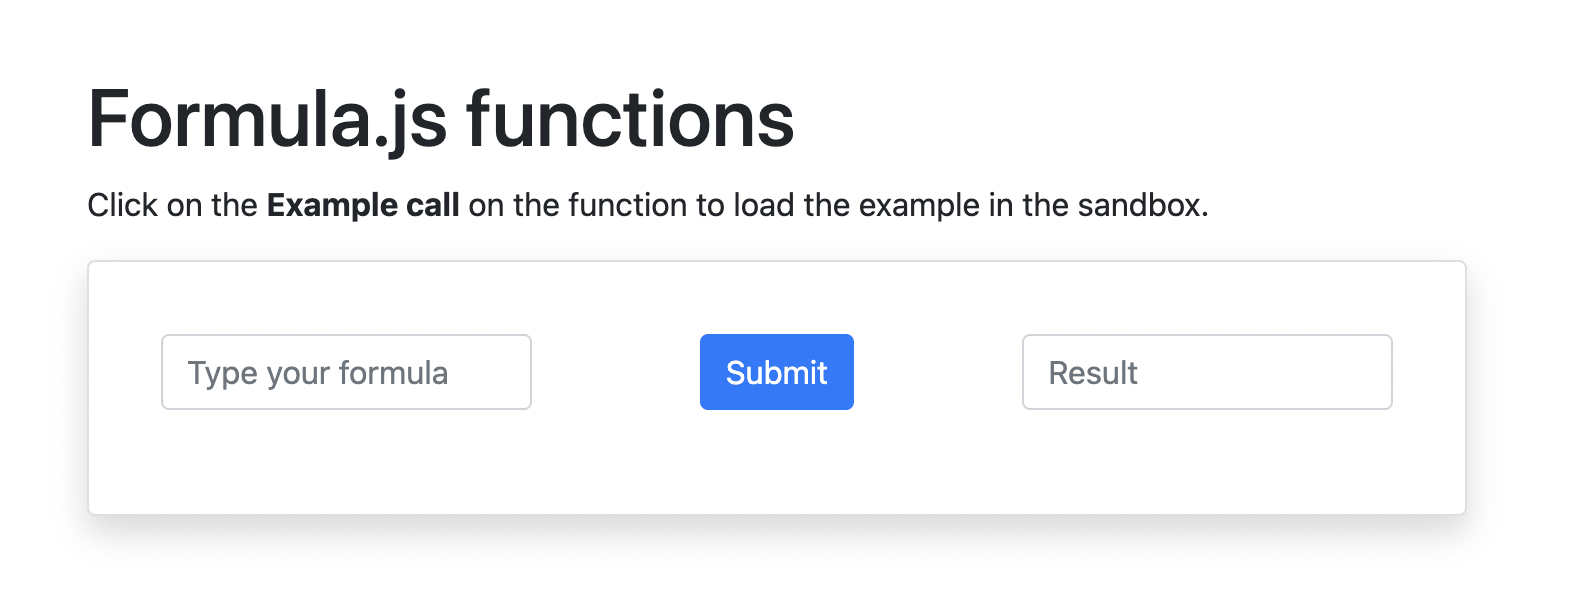
Build your function on Formula.js
First, a point of clarification. Strictly speaking, these aren't true Excel functions. They're Excel-like functions using Formula.js, the tool we use to evaluate and run functions in BrightReps.
Note: While the vast majority of Excel functions are supported here, not all of them are. Your mileage may vary. This is why testing your function here is the best first step. Once you have it running in Formula.js, it's time to bring it over to BrightReps.
Note: Your function should only be entered in ALL CAPS.
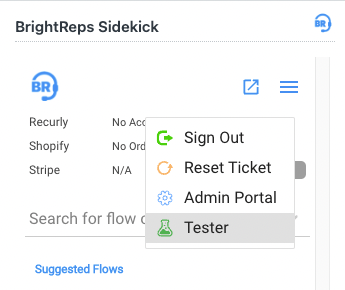
Test your function in Sidekick
As an Admin user, use the Tester feature in Sidekick ( click the ꠵ burger button, then Tester) to run your function in real time to see the result.
Once you've confirmed that the function you've built will run on BrightReps, you can use the ➕ button to the right of the field to pull in BrightReps variables for use in your function to replace any 'cells' or dummy data you had in place from Formula.js.

Update a field with a Function result
Using a Salesforce, Zendesk, and Workboard Update Field steptype, navigate to the field you wish to update with the output of your function. For the field value, type function.excel() - this is what tells the steptype that you want to use a function. If you skip this part, the steptype will only write your function into the field rather than running the function and writing the output.
Then paste the function that you evaluated earlier in Tester in between the parenthesis so that your function is properly wrapped up.
For example, function.excel(YOUR FUNCTION HERE)
Again, if you want to use other fields as 'cells' or variables in your function, you can do that too. Just use the ➕ button to the right of the value field to pull in any available fields from your CRM or Workboard.
Note: For the moment, this will only work if the entire field is used for your function. You won't be able to nest your function within a line of text to update a field. If you want to append text to the beginning or end of the field value, it's best to do that in the function itself.

Here we are using the SUM function to add two values together.
Use your Function with Decision Criteria Logic
Using functions with Decision Tree steptypes can be incredibly powerful and help your agents speed through flows if the information needed to make a decision is already in your CRM or Workboard fields.
- To decide which decision branch to select automatically, write a function that will return the value TRUE for each decision. Again, you can use case or ticket fields from your CRM or even Workboard fields as inputs to this function.
- Once you have your functions for each decision option ready, go into the Decision tree step, click on the light bulb to the right of each decision option to open Criteria Logic.
- Click Add New Criteria. In the new line that appears, set the following values:
- Field: - Function -
- Condition: Function Is True
- Value: Paste your function from Tester here. Note: You do not need to wrap your function in function.excel(). The field already knows to expect a function from your selection in step #4.
- Make sure the Is Criteria Enabled checkbox is checked so that your steptype knows to use this logic when running the flow.
- Click SAVE at the bottom. If you reopen the step, you'll see that the decision you configured now has a yellow lightbulb symbol showing that Criteria Logic is now active.
- Click Publish Changes to push this flow update live.
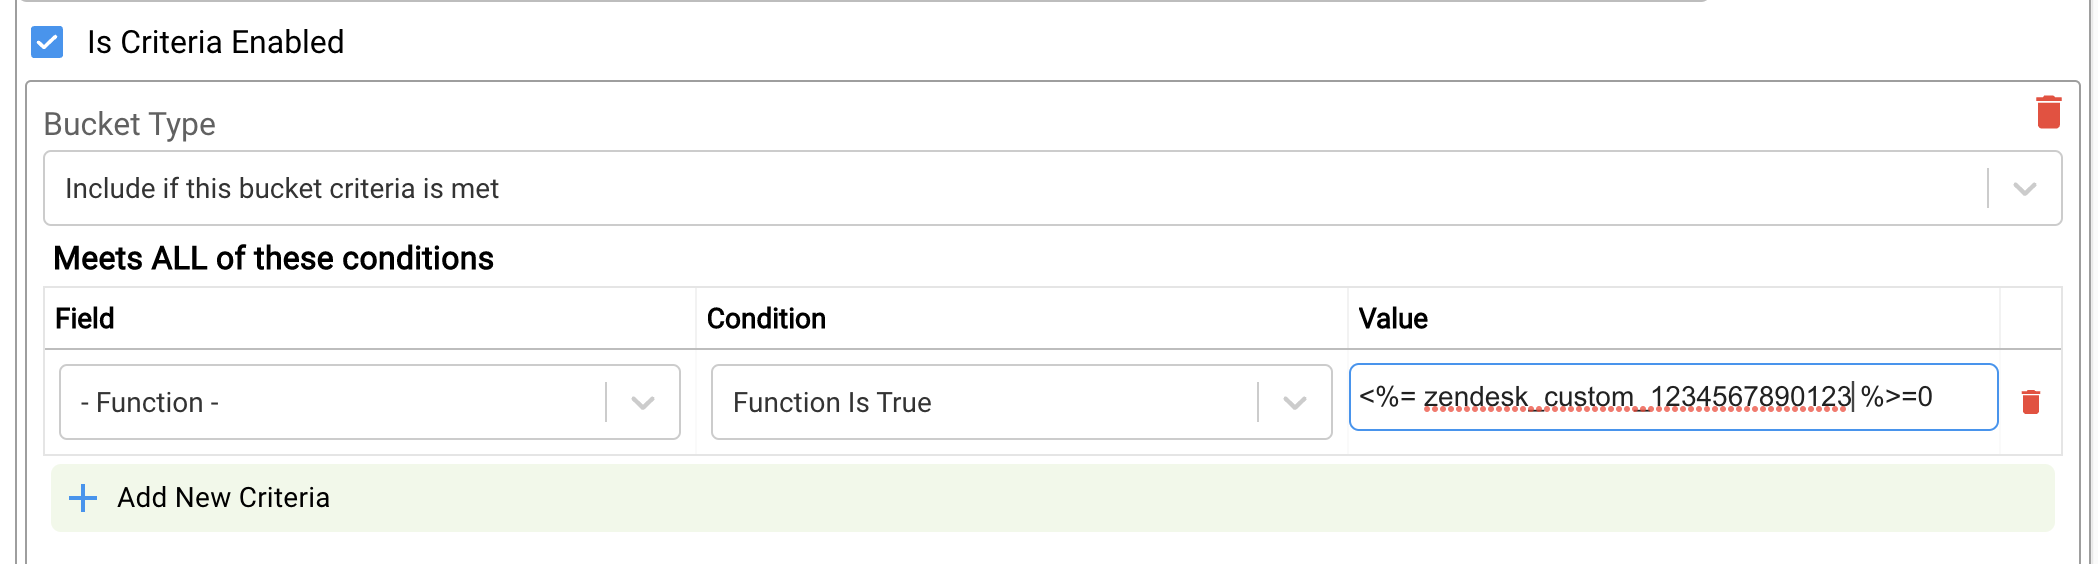
Here we are evaluating whether a particular Zendesk ticket field equals zero.
Your function is now ready to use. Have fun Excel-erating your flows!


