The Add Comment step is a powerful tool that allows reps to automatically draft a customer response right from the ticket using a custom template and dynamic variables. Based on the workflow type being created this step can be used for multiple case types.The most common use case we’ve seen for this step type is to create an auto-response email to a customer. The step can be customized to auto-populate the email based on selected ticket fields and even data from integrated steps can be added (such as including a link to a pre-paid shipping label).
Configuring as an Admin in Flow Builder
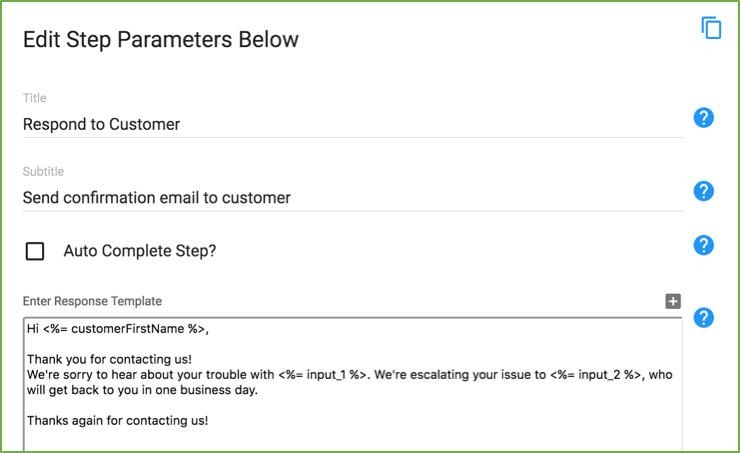
Configure this step by entering your response text in the "Enter Response Template" field.To add dynamic variables to the template, simply click the "+" icon above the Response Template and select which variable to add.

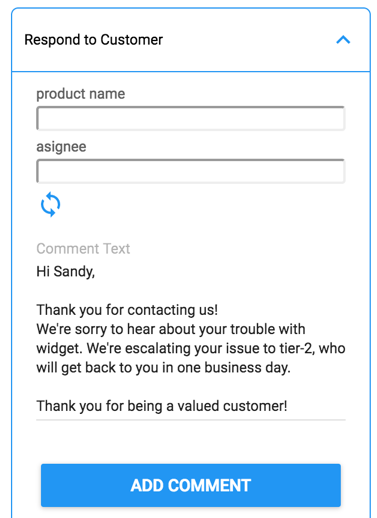
In addition to using dynamic variables from your CRM or previous Sidekick steps, you can also configure fields to prompt the user on Sidekick to enter data that will then be auto-applied to that section of the response template. This is helpful for data that would need to be manually collected and not readily available.

Select "Auto-Complete Step" if you want the step to run in the background without the rep having to review and generate via a click of a button on Sidekick.
Using as a Rep On Sidekick
If you selected the "Auto-Complete Step" option when configuring then the template will automatically be applied to the Comment / Reply field of your CRM and the step will auto-complete so you the rep won't need to take any action on Sidekick.If you did not select "Auto-Complete Step" then the rep would need to select "Add Comment" to apply the comment / response. This would allow them to edit the response or add values before applying it to your CRM Comment / Reply field.

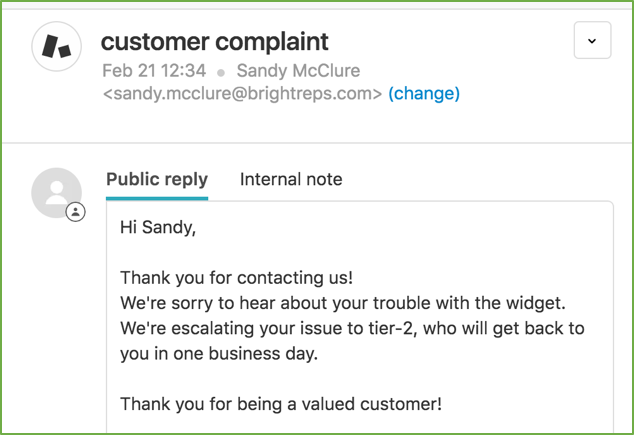
This will then post to the comment/reply section of the Zendesk ticket or Salesforce case. This can post as either a Public Reply or Internal Note depending which option you select on Zendesk before posting the update.


